Monday, December 30, 2013

Doing a little work before I leave out on the 5th

Well I wheeled Beto out of her current storage room berth to let her have some fresh air. I've been working on sanding the forward decks down smooth and getting the fillets inside/underside of the cabin top done. An orbital sander really need to be purchased at this time! All that's really left on the outsides is fillets along the upper deck stringers and underneath sheerstringers, filling the gap along the keep and rounding it, rounding edges of decks, hatch coamings, and final fairing/epoxy coat for glass. It sounds like a lot, but really shouldn't take toooo long.

I gave the trailer some fresh 12" tires. Beto likes being back outside. 2015 she will be afloat! I decided against windows as it would be just one more area to worry about keeping sealed, and I think it would look a little weird with the dodgers that will be fitted. Still debating on installing a beaching skid along the keel. I also ended up going with 19X24 inch hatch openings to which a sliding hatch will be fitted. A 10" ventilation hatch will be fitted at the forward section of the cabin top. 


Thursday, December 26, 2013

Merry Christmas

I have decided not to sell Beto. I can't let life's problems stop the dream! That being said, I'm now looking at a Spring 2015 launch date. I have to work out Of the country all year, but will come back with an enormous cruising kitty, ready to get her finished and get sailing!

 
Current Home for Beto

 
Finished trailer in a day and a half. I'm going to make better cradles eventually, but for now she rolls fine.


Wednesday, September 25, 2013

Racing against Winter!

Well I finally stopped  nit-picking and got the cabins finished out. I still have to varnish each of the middle sections, but I needed to get on with it. As of right now, both hulls have decks and cabin tops installed. I have to do some interior fillets tomorrow in each, however. The outside is so much easier to work on! I'm hoping to be putting some glass on her within the next week or so. I have to go to two months of work out of town for Oct and Nov, which is really setting me back. Hopefully Beto will be swimming around mid December. If I can get her glassed and mostly faired before Oct 7th, we should be in good shape. Fairing is going to be pretty basic. She is not going to be a showboat or anything! I want to get it on and get sailing. Plans are for forest green topsides and beams, and white decks with grey KiwiGrip non-skid. I feel you never want to rush a boat, though. (Port Cabin Top is not glued down in photos)

  Great lines on these Wharram Boats!

Sunday, August 25, 2013

More Progress

I cut out the cabin tops for each hull. I'll have a 10" ventilation hatch forward. I am making a sliding main hatch instead of the standard design with the dimensions of 20"x25". If all goes to plan, I should have the aft decks and cabin tops all installed by this coming Sunday!


Friday, August 23, 2013

Still Working!

Sorry it's been so long since I updated this thing! I've been working during the week and temps have been up around 95 F. I ordered some more slow hardener for the heat, and have been getting a lot done as a result. The forward decks are on, and cabin sides are being installed right now. I'm really trying to get the aft decks on by the end of this week as well. Here are some pics.


Looking like a boat!


Wharram Logo on inboard cabin side of my hull


Bilgekote in anchor lockers. I'm starting to work on the beams as well now.

Monday, July 8, 2013

Been a while

It's been about a month since I updated last. I've started working a ton on the boat trying to get it finished, and now I plan to start updating much more often, perhaps every couple of days. I am more or less set to have the fore and aft decks going on at the end of this week. I have a few things left to do in both hulls in preparation.


I am doing two coats of Interlux Epoxy Primekote and two coats of Bilgekote in each anchor locker. This should be more than adequate protection against anchor chains and wet rodes and anchors. 
 

Deck space galore!


Two coats of varnish in forward end of berth. I'm varnishing these small compartments ahead of time in preparation for the deck installation. It's not perfect, but I'm happy with a good work boat finish.

 Getting there!
 
 I went ahead and got my shower today at Lowe's for a cheap $14. It will spray a strong mist for over a minute on about six ounces of water. 

I did a delivery across the Gulf of Mexico on a 41' cutter last month. Although some things about a big boat are nice, the ease of handling, small cozy berths, and flat ride of the tiki has me wanting to get it done already!

Thursday, June 6, 2013

I got the starboard bunks all filleted in and glass taped today. I'm going to do a fill coat in the morning. I also knocked out all of the mini fillets for the beam compression struts and shaped and coated the port hull lifting bunk sections. I'm sorry for the poor pixel quality. There's almost no light in the garage after dark.

 
I used Scott Williams' method of blue masking tape again. I didn't want a full 3" piece of tape for the bunk fillets, so the tape makes a nice line and lets me make a narrower strip.

 
All taped and cut

 
All that's left on this hull are the lateral lifting section supports, a final epoxy coat, and varnish........and lots of sanding. I'm going to sleep in there tomorrow night to see how it feels!

Wednesday, June 5, 2013

Well the starboard bunks are going to be installed today. I was going to do them yesterday, but I ended up going down to the coast to pick up a hobie 16 for a friend, and we sailed it out to the barrier islands all day. It has been almost a year since I've been on a cat, so we had a blast surfing back home at the end of the day. I put a pretty good coat of epoxy down in to the bilges of the starboard hull as a final coat. There's some orange peel, but it's the bilge. I just want it good and sealed. I also picked up some Interlux epoxy primekote for the anchor lockers. It's sad that West Marine no longer price matches online competitors. Apparently this changed in June :(   Nothing but the best, for Beto, though! Plus, doing the anchor lockers will give me some "not-so-visible practice" with two part paint for doing the outside of the hulls.

Friday, May 31, 2013

New Horizons

I have had a lot going on for the past few months, but I went on a three day kayak trip down the Big Black River with my buddy Brennan earlier this week. I built a small pirogue last summer, and Brennan bought it from me. He ended up taking the pirogue on the trip. Seeing a boat that I built functioning, coupled with the wilderness of the Big Black, got the Tiki juices flowing! I had lost sight a bit, I think, of what this boat is being built for, but now I have regained full awareness. I'm working my ass off now to get Beto up and running, so the blog will be getting updated much much more often from now on.


Brennan enjoying his pirogue


Sanded Starboard Hull Ready for Final Coat of Epoxy in Bilges

 
Starboard Bunks Being Coated

 
Endgrain on Beams is Being Coated to Prep for Top and Bottom Planks

 
Pull Out Bunk Section Supports

 
Soon Both Hulls Will Have Bunks!

 
Experimenting with Bilgekote to See if I'll need a Primer or Not

Tuesday, May 14, 2013

Sails

I found a pic of my sails on my phone. It's not a great one, but you can definitely see the crisp-factor on them! I got the same sails from Westaway that Rory used in the Jester Challenge. They should zoom Beto right along!


Monday, May 13, 2013

I'm up at Fort Bragg in NC for some training right now. I will be back on the 24th of May, and I will be getting back to Beto. I'm ready to knock it out! I've been sailing a Capri 25 and a Sabre 34 almost every day since I moved home to MS, and I haven't been this happy for a long time. I'm just ready to get back on a multihull! You can't beat broad reaching with little to no wetted resistance on a multi!

Wednesday, May 8, 2013

Trailer

I decided a long time ago to build a trailer like Rick Hueschen's, and I was prepared to drop the $1200 or so to get the exact same one. However, I found a galvanized Hobie 16 trailer here in town on Craigslist and managed to get it for $220 bucks! It needs new tires, but they are cheap. I need an extra three feet added to the tongue to clear the bows when turning, but I got a quote from a welder here of $80 bucks to add on the extra length. Between that, the parts for the hull cradles, and the tires, I should have a telescoping trailer for less than five hundred bucks!


That's my mast sitting on top 

Monday, May 6, 2013

Crossbeams

I discovered the magic of 36 grit belts for my belt sander. I had to sand all of the beam compression struts down and fair with the curve of the web. I was using 80 grit belts which took FOREVER, but I managed to knock out two beams with 36 grit in twenty minutes. I'm seriously stoked on these belts right now! Anyways, the magic belts have provided even more inspiration to get Beto knocked out. Here is a picture with the top and bottom planks clamped on temporarily.

Wednesday, May 1, 2013

Finally back to work!

So after much procrastination, I have regained my full motivation to get Beto going. I sold my Montgomery 15, and the stress of having to store it and everything is gone finally! Today I sanded down the edges of all the glass tape in the cabins to prepare them for a fill coat. I have made mini fillets on all of the diagonal stiffeners in the anchor lockers and bilges as well. I really want to get some decks on this thing. Tomorrow I'm cutting and gluing on the bunk bearers for the starboard hull, and hope to get them in quickly. The Lowe's here actually sells select Douglas Fir lumber, and I am pretty stoked that I don't have to drive two hours to get it anymore. Anyways, here is a picture of Beto in the new garage.


Monday, April 29, 2013

Well the Dauphin Island Race went well. There were around 170 boats in the race! The course started in the center of the North end of Mobile bay, and went down to end by the ICW by the Dauphin Island bridge. The first two hours had an almost nonexistent wind from dead astern, and that wind ended up switching to a 20kt Southeast breeze that made our Compac 23 rather unhappy. It's shoal draft keel and plumb bow do not mix with steep chop of the shallow bay and going to windward. Our rudder kicked up slightly in the chop, which made for exciting weather helm for the rest of the race. Despite this, we finished first in our class, completing the 18 mile course in around 5 hours. I saw several Nacra cats zooming along way ahead, and I definitely miss screaming along at 20 knots boat speed! The race got me motivated to get this whole tiki thing knocked out, so I should be posting more often from now on.


Wednesday, April 24, 2013

I'm sorry I haven't posted in a while! Work has been pretty slow with the boat for the past few weeks. I'm crewing in the Dauphin Island Race this weekend, and after that I should be back to working pretty hard on it. My sails should come in tomorrow, so I'll post up some pictures of them and the boat tomorrow.

Friday, April 12, 2013

Well I apologize for not updating in forever. I've ended up moving back to Missisippi, and set up the tiki in my buddies garage while we finish it out. I have got the decks cut out and yesterday we finished glass taping all of the keel and bulkheads in the starboard hull. I will post some pictures up tomorrow. I ended up loading Beto into a 26' Uhaul truck to transport her home, which was a very interesting sight to see, and made me glad I decided on the 21 and not the 26!

Saturday, March 16, 2013

Today I finished up applying glass tape to all of the bulkhead fillets, and I cut out the forward and aft decks. Grace worked on filling in the stem and skeg with fillet material. We are on the way out to a movie right now, so I don't have time to write much. I will note that we were all ready to go bouldering at Moore's Wall tomorrow, but rain has come into the region and completely laid waste to our excitement and plans..........


We could have been crushing (or attempting to) here   :(

Thursday, March 14, 2013

I didn't get anything done on the boat today, but we did get another shipment of rigging in the mail.

  • Main Sheet and Halyards (Green)
  • Jib Sheets and Halyard (White)
  • Traveller (Black)
  • Traveller Control Lines (Black and White)
  • Downhaul
  • Deck Cleats for Sea Anchor/Anchoring from Forward Beam
  • Deck Cleats for Stern Deck (Drogue Deployment)
  • Harken Swivel Cam Cleat for Mainsheet

Wednesday, March 13, 2013

Well I almost made it! I forgot that I hadn't added the backing pads for the forward beam and shroud lashing pad yet, so I have six fillets left to do. These will be easy though. Grace's brother is in town and managed to loft up the decks for the port hull today.


Tuesday, March 12, 2013

Today I applied glass tape to the bunk fillets in the port hull. I'm using the method Scott Williams used on Element II for the taping, since I didn't want a massive 3" wide piece of tape on small bunk fillets. You simply mask out the size you want the finished product to be with blue painters tape. Then, you apply the tape. Once the epoxy has cured for an hour or so and it is somewhat difficult to pull up the tape, you cut right inside the painter's tape line and peel away all of the excess. It makes for a nice, clean outline. I also glued in all of the diagonal stiffeners in the starboard hull, and tomorrow, hold your breath, I will finish out all of the bulkhead fillets in it.


Tape and Excess Peeled away. Tomorrow I will apply a filler coat to fill in the weave of the cloth.

Monday, March 11, 2013

Well the weather is finally starting to warm up! I have filleted all of the bunks, top and bottom, on the port hull. Getting underneath and applying fillets to the bunks' undersides was a bit of a pain, but I used the zip lock bag method and it worked out pretty well. I mix the fillet material (microfibres, silica, and wood flour) and then scoop it into a ziplock bag, keeping it all in one of the corners of the bag. Then I squeeze the air out and twist up the bag and cut a hole in the corner. I then essentially have a cake icing setup, which allows easy and even flow of the epoxy into tight corners whilst bent over the hull and looking into a dark bilge. The use of a flashlight to help light up the working area proved quite helpful as well. I plan on glass taping all of the fillets tomorrow, and installing the diagonal stiffeners in the starboard hull as well. I really want to be ready for decks by the first of April. If this warm weather holds up, it shouldn't be a problem at all.

All nice and filleted. I really like the hue of the wood flour compared to our plywood.


We also got in our first shipment of rigging. Today I received:
Traveller Control Line Clam Cleats and Block
Swage Tool
Downhaul Clam Cleat
Jib Sheet Cleats and Blocks (One Block was Shipped Seperately)
Jib Halyard Block and Cleat (Black Horn)
Main Sail Blocks and Snaphook
Main Halyard Blocks and Cleats


Tuesday, February 26, 2013

Tillers and Beams

I got both of the tillers glued up. The curve between the two is identical, but I experienced about an inch and a half of spring back when I released the clamps. This shouldn't be a problem, though. The tillers are curved to enable Ackerman Differential Steering. Basically, like a car, the other hull will need to travel faster than the inner hull when turning, and the differential steering allows the rudders to turn at seperate degrees. The inner rudder will be turned less and the outer more in order for the outer hull to spin around faster and catch up. I have also started up the installation of the beam compression struts. The tillers will undergo extensive sanding and shaping in a short while. Here are some pictures.


Wednesday, February 20, 2013

Small Projects

I wasn't able to get any work done on the boat over the past two weeks, because I was out of town for some work stuff. The good news is that the two week break got me amped up to start building hard again. I have decided to stop working on the hulls for a bit because I want it to get a little warmer out, and I'm also kind of burnt out on them for right now. This short time will also allow me to get some of the smaller parts done for later on. That way, when the hulls become complete, I can go sailing and not have to worry about making the tillers, tiller bar, gaff, beams, etc etc etc. Two finished hulls should mean ready to roll in my book. This week I'm working on the tillers, tiller bar, and gaff. I spent a laborious day ripping all of these pieces out of 2x6 Douglas Fir boards. Needless to say, the diabolical table saw and I had a few altercations that ended in it getting kicked a bunch and even thrust onto it's side. The problem is that the fence on  my circa 1991 table saw is a POS. It is old and rusty, and it moves because it doesn't clamp down properly. Today I had a revelation, however, and decided to use the 2x10x4' long piece of Mahogany as a fence. It clamped down so beautifully, and it held tight, not even trying to budge while board after board walked past. It was as if the mahogany was shouting thank you for bringing it out of the dim, dark closet and into the bright, warm sun outside. Needless to say, the mahogany will be my fence from now on until it has to itself be cut down into miscellaneous parts. Anyways, I ripped the tillers, tiller bars, gaff, and lumber for the beam compression struts, as well as making the spacers for the tillers. I will glue up the tillers and tiller bar tomorrow, and start working on the gaff. I am hoping to have all three complete (minus coating and shaping) by Friday night. After these are done, I'm going to jump into the beams and knock them out. Hopefully after that I will be refreshed and ready to knock out the hulls and fair and sand and paint and assemble and make trailer and rig and......................etc.


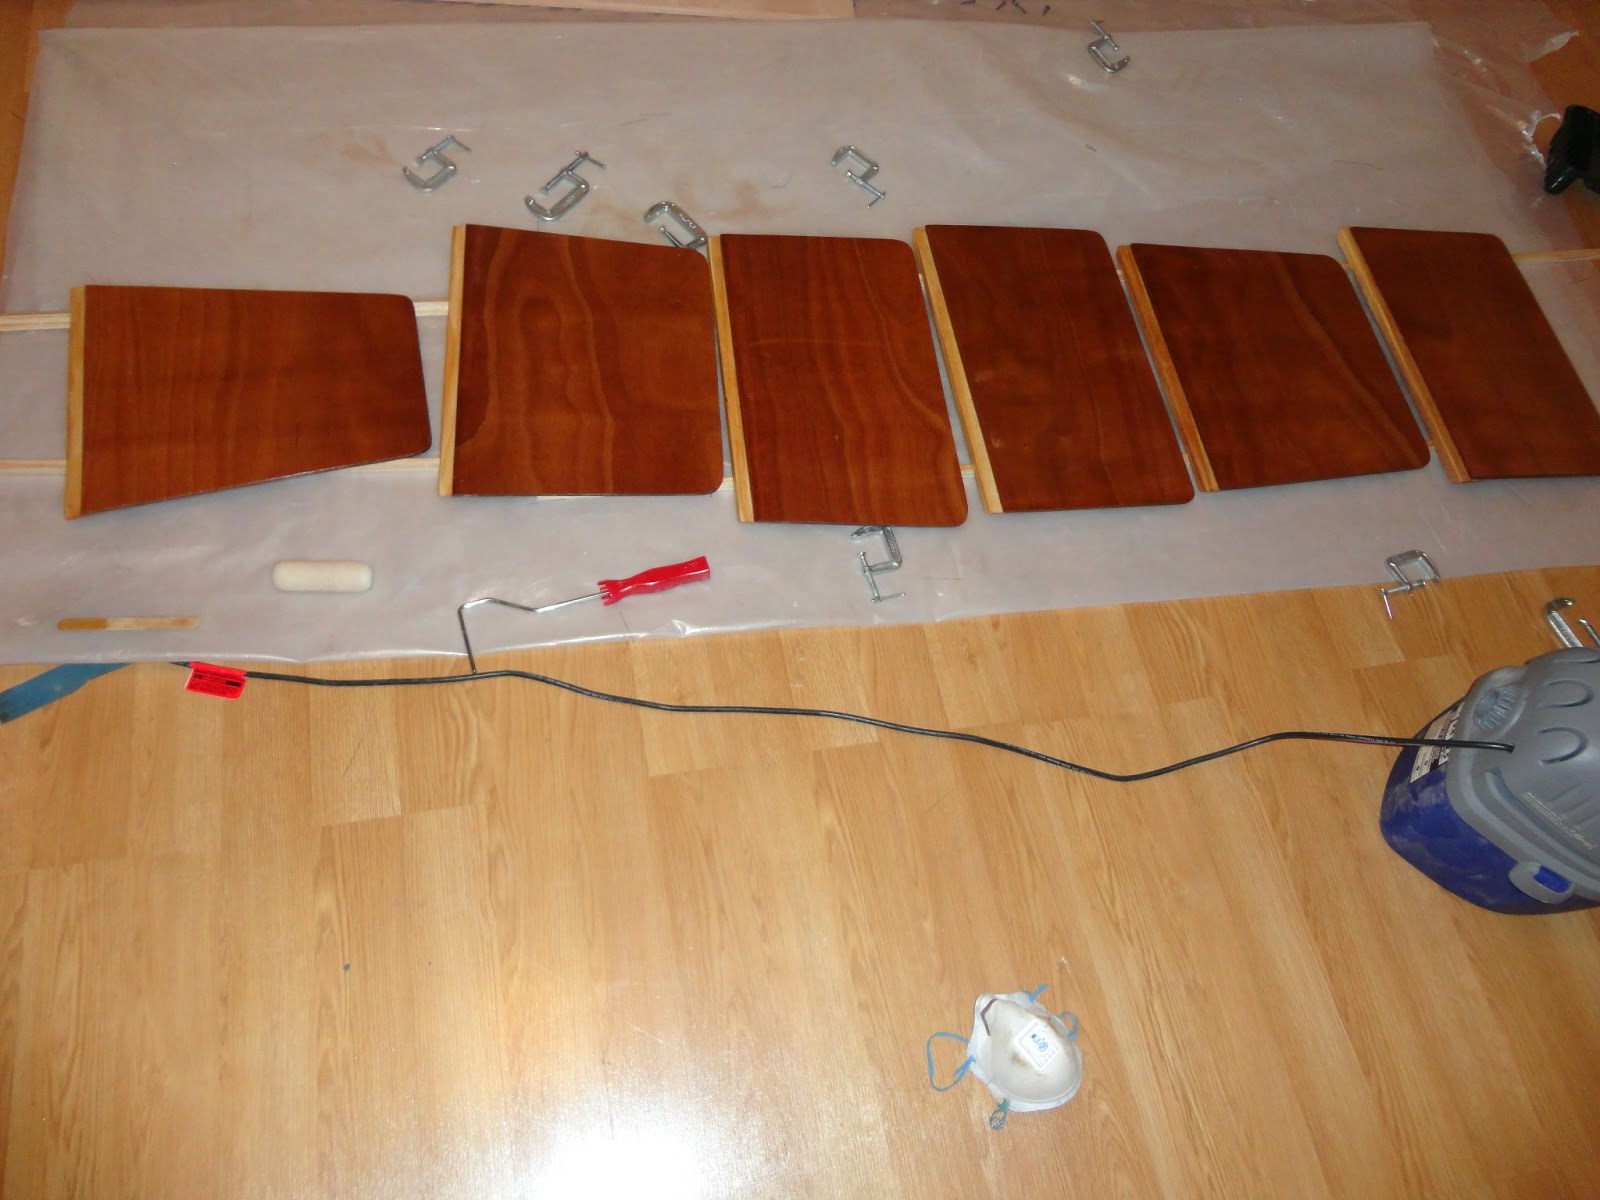
All the pieces clamped for rough idea. Tillers will be forced to curve ten inches when actually glued.

Friday, February 1, 2013

Why "Beto"?

Well Beto is a pretty unusual name for a sailboat, or any boat for that matter. It started with my friend Sean and me sailing a Nacra F18 all summer, and reading all of the stories about people crossing oceans on sport cats. Through a little looking around, we came across Beto Pandiani. The first voyage of his that we saw was a Pacific Crossing on a 25' Sailing One sport cat. It was basically a 25' F18. He custom made wings with little sleeping pods on them and lawn chairs on the back for a more comfortable helm. It turned out that Beto has been doing all sorts of journeys on sport cats. His first voyage was from Miami to Brazil on a Hobie 21. He has also crossed Cape Horn, sailed the Drake Passage, and sailed to Greenland on these small boats. So if you can't tell, we were inspired by Beto and his voyages. He sailed scary passages on a Hobie 21, and we are building a Tiki 21. Every time we sailed through a nasty squall on the Nacra, we were always yelling BETO! in his honor, so it's only natural that the name stuck around. Moitessier was inspired by Slocum, and we are inspired by Beto!


                                                      Beto in the Southern Ocean

Flickr album of all of the voyages

http://www.flickr.com/photos/betopandiani/


Bunks Glued

Today I sanded down the second coat of epoxy and finally glued the fixed bunk sections in (port hull). I can't wait for these to cure so i can fillet them and start sleeping in the hull a little bit. Once I get these filleted, I'm going to bring the starboard hull up to speed. I need to install the stiffeners, shape and attach bunk bearers, coat bunks, and tape the bilge and keel fillets on it to get it to the same point as the port hull. The bunks are already cut, which will save time, and I have gotten better with the glass tape and stuff which will save time as well. I learn/ figure out everything on the port hull (which will be mine upon completion), so the starboard hull is typically quicker and easier as a result, and typically looks better :/    We want just an overall workboat finish, but I think it's looking pretty nice so far. I can't wait to varnish the cabins. Varnish will be more maintenance, but I favor the warm feel and look of the wood finish inside. During winter, a white painted cabin just looks and feels cold to me.

Wednesday, January 30, 2013

I gave all of the bunks their first coat of epoxy today, and I did the final coat in all of the bilges in preparation for the bunk installation. I also knocked out a few more fillets in the starboard hull and milled down the lumber for the tillers on the table saw.


Second from the left is the fixed bunk section that sits underneath the main hatch. The stock width (fore and aft) is a small 12". The narrow width, to me, makes for a bit of an awkward sitting position when my feet are the in the bilge. I basically have to be sitting with my back completely straight, and I can't really recline against the bulkhead. Maybe this is because I'm six feet tall. Anyways, I ended up extending the width to 14", and after testing it out, I really appreciate this mod.

Tuesday, January 29, 2013

Warm Weather!

Today was an outstanding 70 degrees, and I managed to glue up the bunk bearers to the bunks, fill the screw holes in the port hull, and get some starboard hull fillets done. I also sanded and rounded the corners of the starboard hull diagonal stiffeners. Tomorrow I'm going to final coat the bilges after a little sanding to prepare for bunk installation. I'm also going to coat the bunks and stiffeners with the first coat of epoxy. Oh yeah, I also made some mini-fillets along the top edges of the diagonal stiffeners in the port hull, to give it some real pizzazz. It turns out that slacklining in conjunction with boat work helps me relax and get some frustration out. I can take a break whenever I need it, and head to the front yard for some balancing!